Several years ago, I dated an Italian. Both sides of his family were Calabrian, and those nonnas could cook like the dickens. One of them would regularly serve these little green tomatoes with bread before dinner. They were soft, olive oil-y, a little bit tart, and absolutely delicious.
Recently, I’d been thinking a lot about those tomatoes. Problem was, I had no idea what they were, much less how to make them. At first, I thought they might be fried green tomatoes (obviously, I had no idea what fried green tomatoes were either). Then, I thought they might be pickled tomatoes. Strike two. In a last-ditch effort, I googled “italian green tomatoes,” and I found this. Success! As I read, I recalled inquiring about the tomatoes once and being told something about a bowl and a weighted-down plate, on top of a fridge “for a friggin’ week.” This was it. And as luck would have it, I had a ton of green tomatoes in my garden.
Here is what you will need to begin the process. From start to finish, this should take about 2 weeks (I am currently 4 days in). Since I am preparing around half the amount Linda did (and because I am extremely impatient), I will check them after a week and a half.
- around 15 green tomatoes, approx. 3 inches long and 1.5 inches in diameter (you don’t need to use roma, but they must be 100% green)
- 6 garlic cloves
- 3 tablespoons of fennel seed
- a lot of salt (regular, not kosher)
- 1 large, semi-shallow ceramic or glass bowl
- 1 slightly smaller ceramic or glass plate
- something heavy
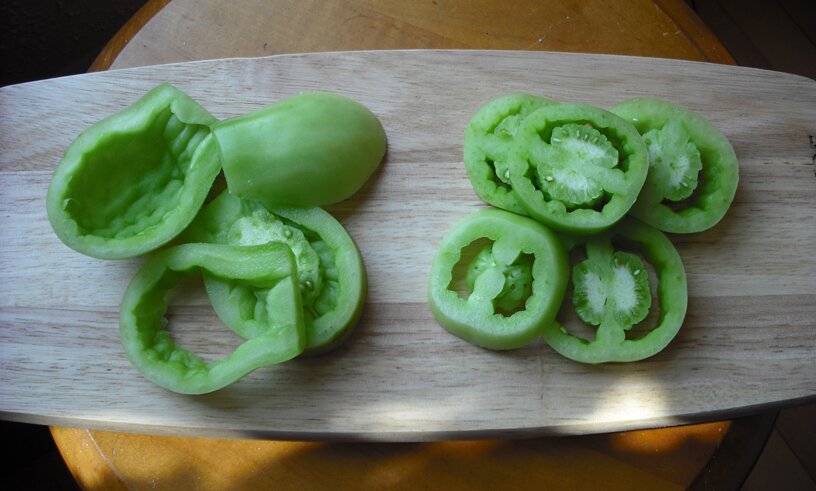
Slice garlic into large-ish chunks. Remove the tomato eyes and cut into 3/8 to 1/2 inch slices. Cut widthwise (I began slicing lengthwise by mistake).
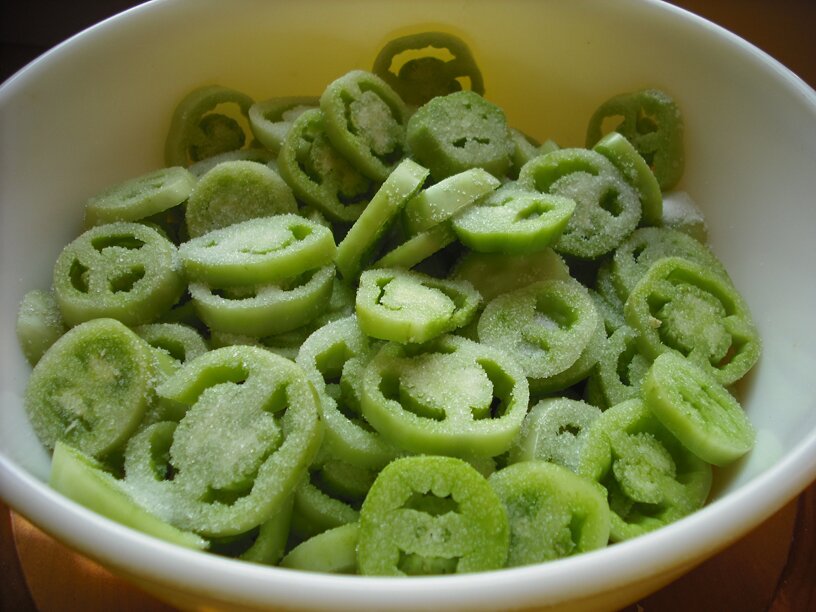
Once you’ve finished, place only the tomatoes in a bowl (not the one you will be layering everything in later) and salt liberally. And I mean liberally. (Your goal over the next 2 weeks is to draw out the majority of the water—you need lots of salt to do that.) When you’re done, it should feel like you took your pretty little bowl of tomatoes to the beach and accidentally dropped them in the sand.
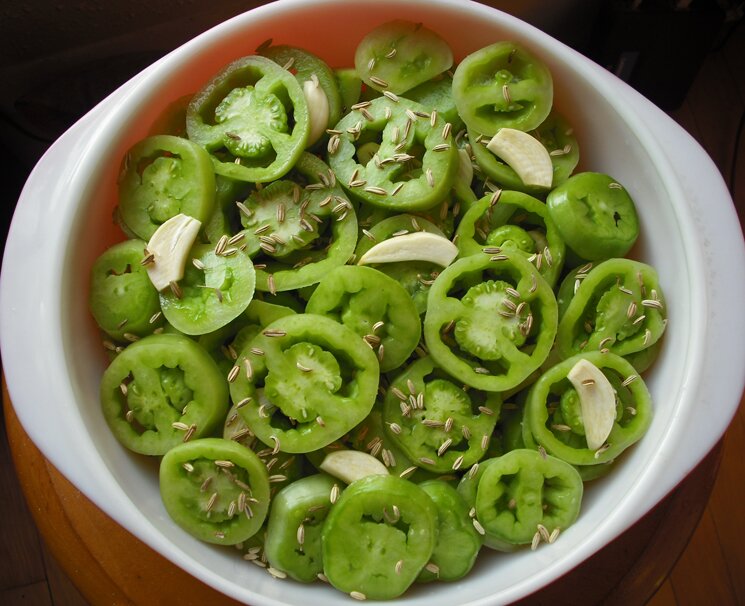
Begin layering tomatoes in your ceramic or glass bowl. Intersperse garlic slices and fennel seeds throughout, until you have used up everything.
Once you’re done, place your plate on top. Remember, the tomatoes will shrink in size as the water drains out, so your bowl must be wide enough for the plate to migrate about 2/3 of the way down.
Now, place something heavy on top of the plate. In Linda’s post, she notes that you should not use anything metal. The most suitable item I had was my growler-turned-change jar, and the only thing I could find to stabilize it on top of the plate was a stainless steel bowl. Hopefully this won’t be a problem. We’ll see.
Phase 1 complete! The tomatoes will release a lot of water, so it would be ideal to place them outside. If you can’t, set the bowl on a tray or in a larger bowl that will catch any excess liquid. You will also want to wrap a few heavy-duty plastic bags around everything, to keep out flies and other unwanted pests.
And now, it’s time to wait! Whether a success or failure, I will post a follow-up in about a week.


